So, it was finally time, after putting up with my clothes literally popping off me, to make myself some new 17th century clothes for working on a stall. I currently have a shift, bodice and skirt, the shift and bodice being too small by about three sizes, only the skirt fitting, but it had popped it’s poppers once too often. This post is just about the construction of the stays, but I will include pictures of the bodice that I have nearly finished, the skirt that I mended and the shift that I need to make a new version of.
I started with a very basic two-piece pattern that had come from a well-known costumiers. Luckily, it was already very similar in size to my own measurements, so there were only a couple of inches to adjust while I was pattern drafting. The original pattern was short-bodied, no tabs, and shoulder straps like that on a vest, so I redrafted it, along with three fittings, to suit my own size and modified the shape of the neckline and armholes to turn the straps into ones that tied onto the front.
Next, I cut that final drafting in scrap cloth for another fitting.

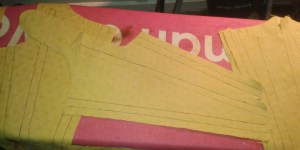
This is the final basic pattern draft in scrap cloth.
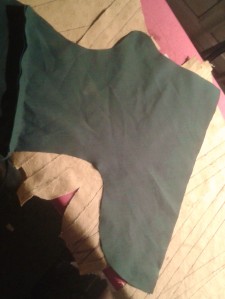
This is the basic pattern draft front in scrap cloth.
Next, I knew that I wanted tabs on these stays. Tabs remove the sharp line that cuts in on the waist with the 17th and 18th century shape, makes the wearing much more comfortable and more importantly, helps to distribute the weight of the skirts and bum roll (17th) and panniers (18th). I drafted some different shapes and sizes, pinning along the waist line to work out the right draft.
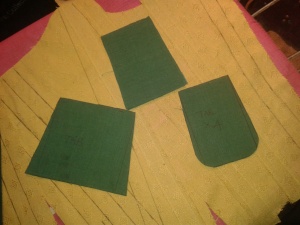
These are some shapes that I was playing with, I also used these to form other tabs for the over-bodice.
I wanted to cut the stays and tabs traditionally as one, rather than attach them after, as you would do with a bodice. This not only makes proper boning very easy, but increases the strength of the garment as a whole. I also have only half-boned these stays, they are designed completely for my comfortable all-day working wear.
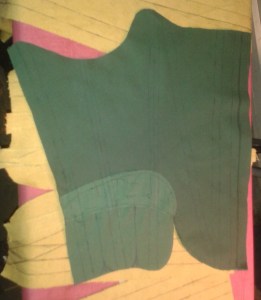
Here, I have added a single, carefully calculated shape. I will cut it into it’s individual tabs as I sew the stays, this makes construction much more simple.

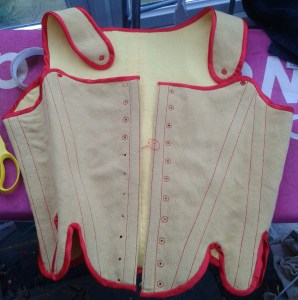
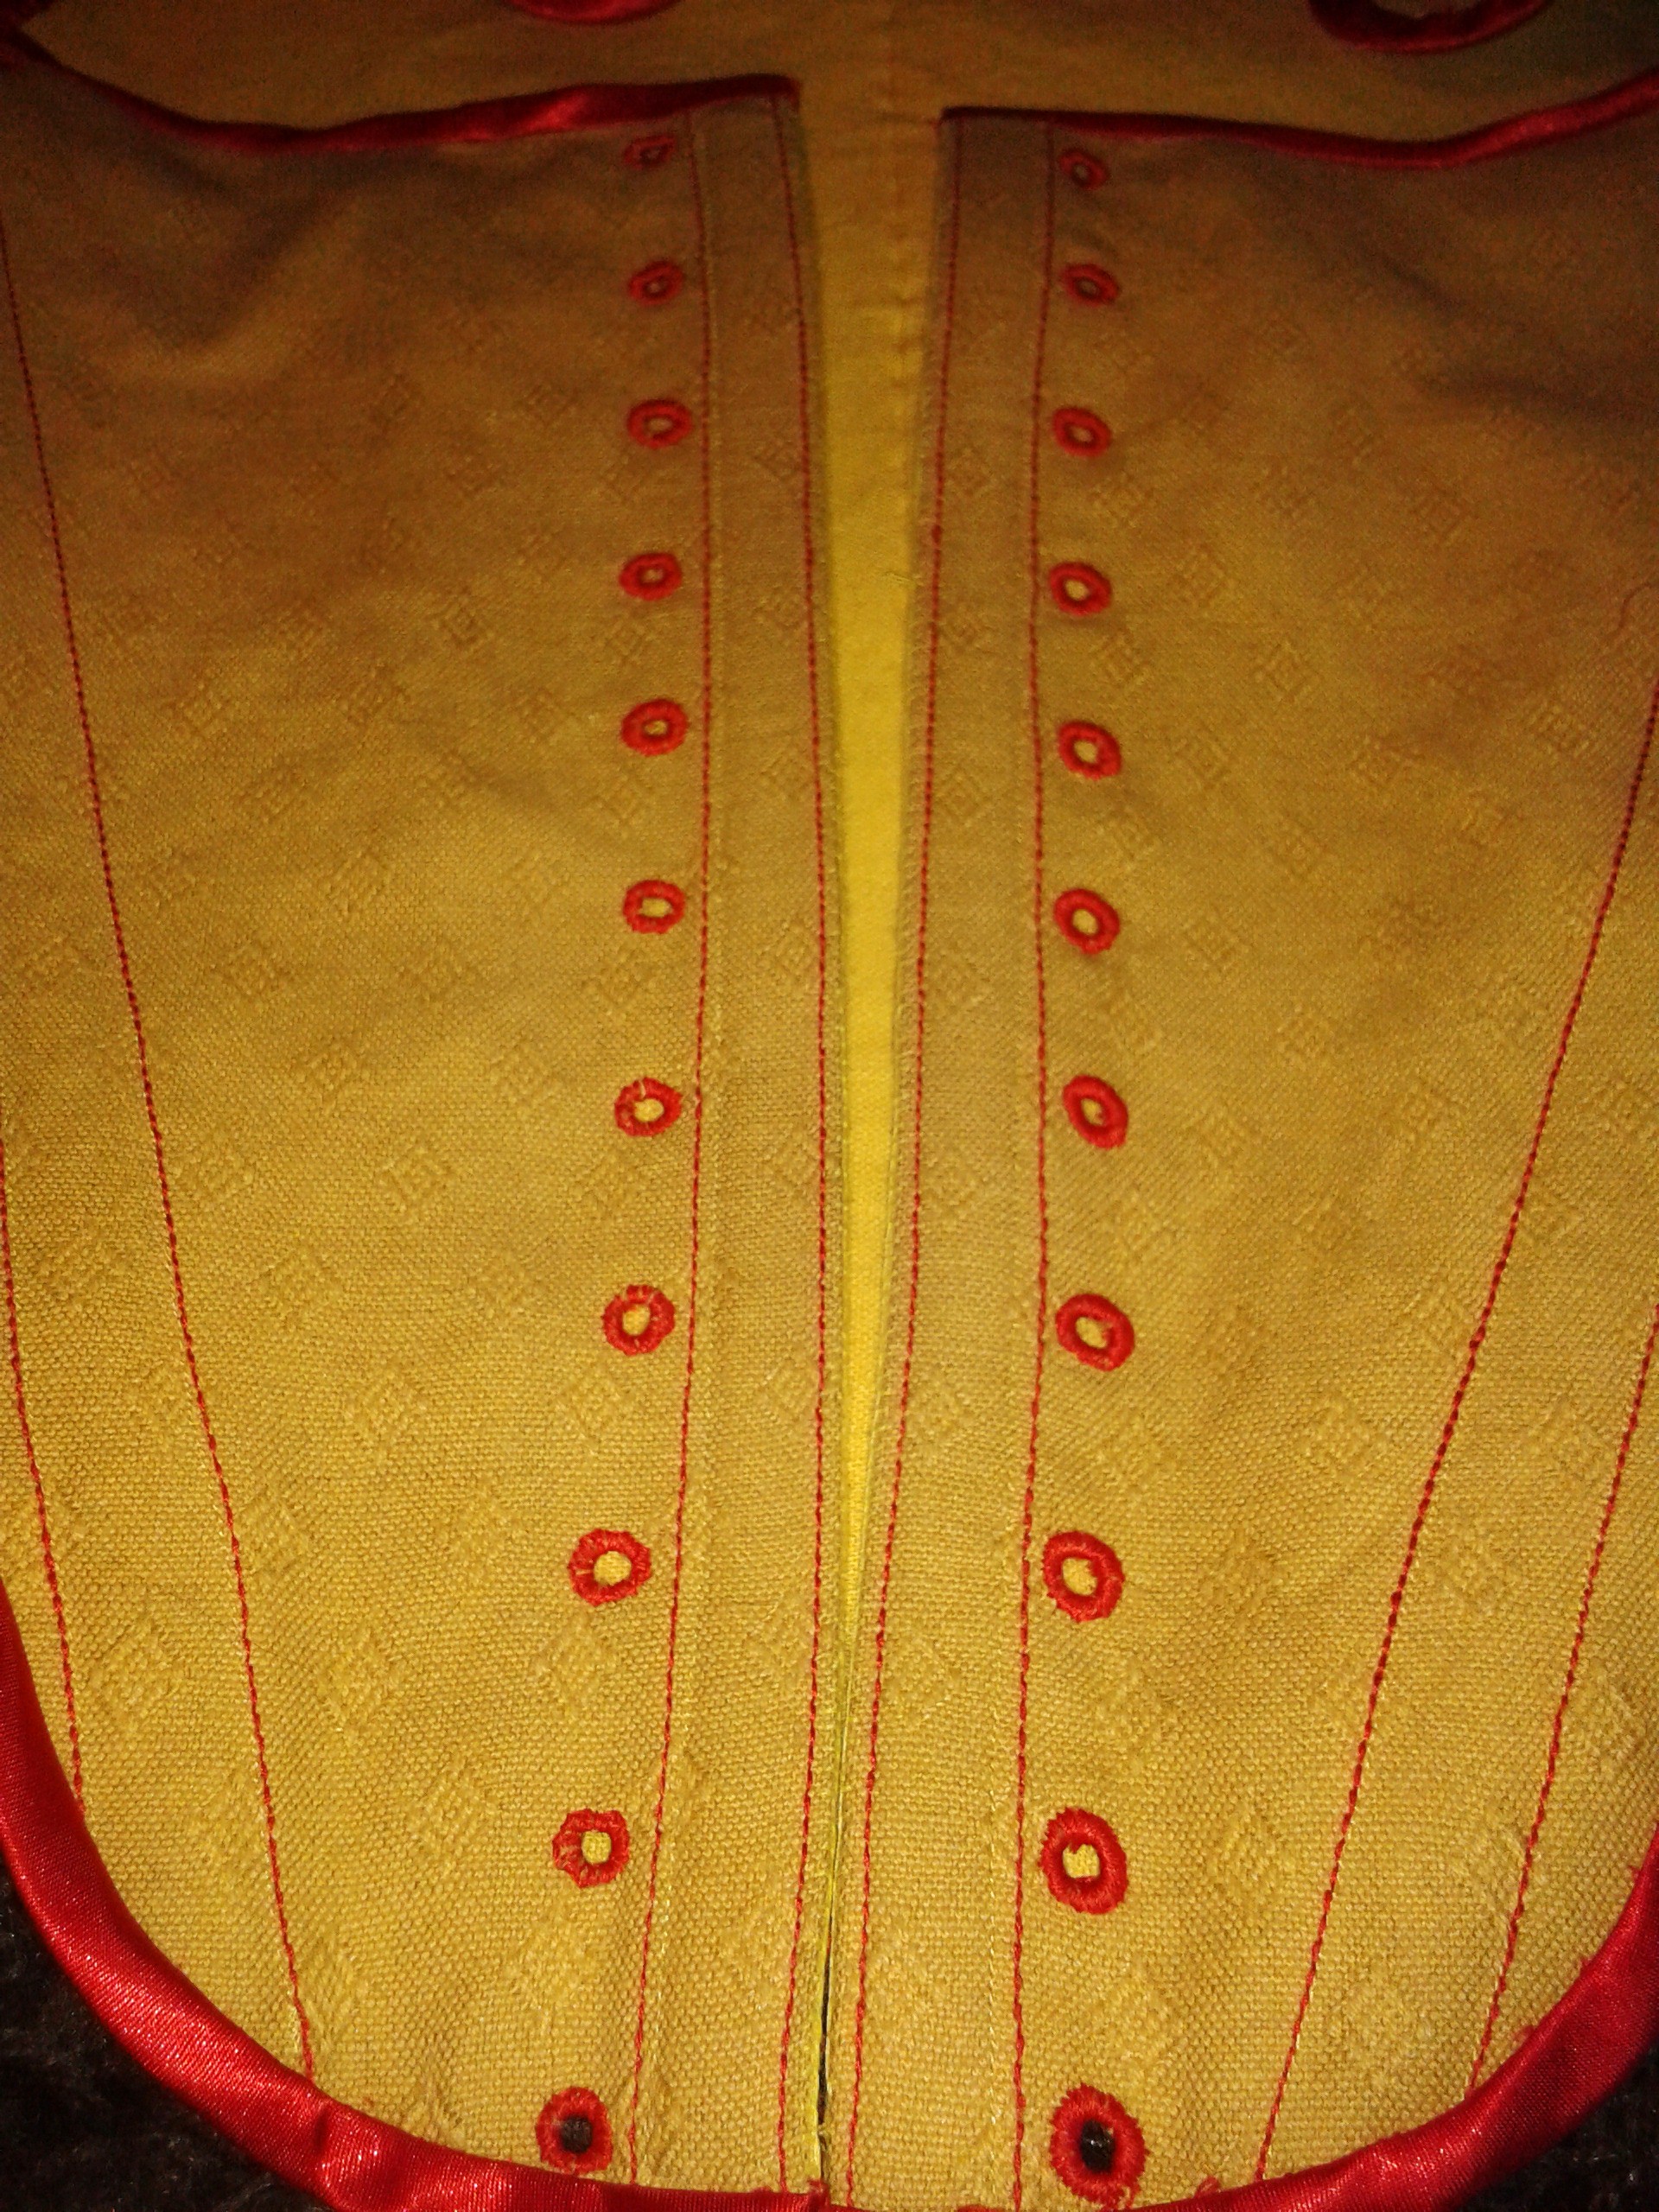
Next, after a final fitting, I cut the stays in their finish fabric. I recycled some yellow, tough cotton brocade and cut an inner and outer layer, then a lining layer of yellow linen to go next to my skin/shift.
After sewing the fronts to the back (I cut the back in one piece for stability when lacing), I then marked out boning channel placement on the wrong side of the inner layer and cut some self-fabric strips to make channels with. I machine sewed the channel strips over the channel marks. I did this for two reasons – firstly, I was going to temporarily bone these with Rigilene and wanted to later replace with steel and secondly, my construction methods on this are not 100% historically accurate because I chose to machine-sew most of this.
I cut straight along the grain for some, bias for others, depending on the curve of the channel lines.

I originally sewed each channel strip with one line of running stitch in just-visible yellow, then went over this with red top stitching on the right side of the fabric.
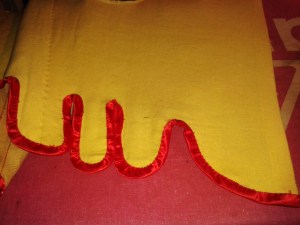
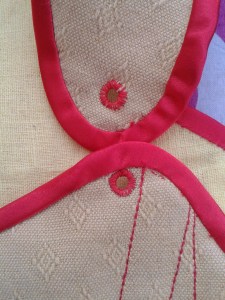
Next, came the real challenge… Bias binding by hand around curves, hairpin bends and corners! I handsewed all of the bias, using techniques I have been taught by other corsetieres.

If you look closely, you can see the thread marks where I have already ripped this all off and sworn at it before I was happy!

All sewn down, ready to turn under and stitch on the inside now.
This is almost satisfactory for me, but good enough for what I need.
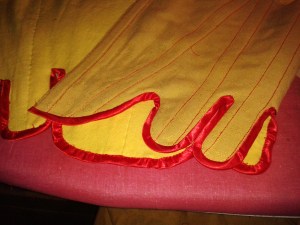
This is the inside all sewn down carefully, distributing excess binding around corners to keep it even on the right side.

At last, all sewn down after two days of swearing, needle stabs and tired eyes!
Next, came something I find particularly relaxing, hand sewing eyelets. I marked the placements, used a hand tool to cut perfect circles, then sewed away for two days with top stitch thread in red, to match the boning channels.


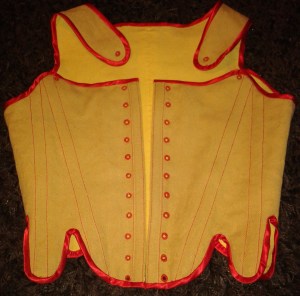
At last, finished after a whole week!

Here they are, in all their glory! Obviously, when I am wearing them, they conform to my body and pull me into the traditional 17th century shape, whereas on Hilary, they look a little odd….
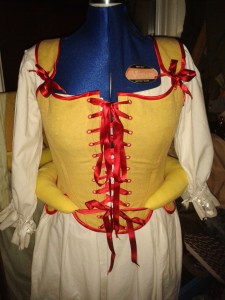
Here they are with a little bum roll that I made from the same yellow linen as the lining.
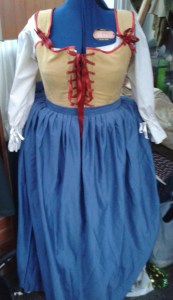
This is the skirt that I mended, worn over the bum roll and stays.
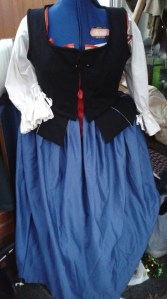
This is the tabbed, sleeveless bodice that I have nearly finished. Black wool, white cotton lining, a single bone in front of the eyelet placement for stability. It is contrastingly soft in construction, because the stays provide the shape for it and it is fitted tightly over them.
Next, I am making a sleeved bodice in the same fabric as the skirt, so more to come.


You must be logged in to post a comment.